
Rustic Italian Crusty Bread Recipe Video
This post may contain affiliate links. Read our disclosure policy.
Easy and quick artisan Italian rustic crusty bread at home, no knead, no machine, no dutch oven, with only 2 hour rise time. Made by hand with active dry instant yeast, flour and water then baked on a hot pizza stone.

Artisan Italian Crusty Bread Recipe
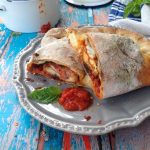
I made us the perfect bread for soups, stews, bruschetta and to use for sandwiches / panini all week long.
A spin on my Italian pizza dough recipe, except here i use warm water to make the bread. Just mix together flour, salt and instant yeast then let rise for 2 hours. Only 2 hours for perfect homemade bread you guys!
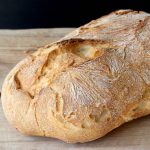
Then you bake it on a preheated pizza stone (<–amazon), for a peasant style loaf that crackles in your hands like a dream, yet still soft on the inside. Perfect for dipping or to dunk into a hot bowl of vegetable soup.

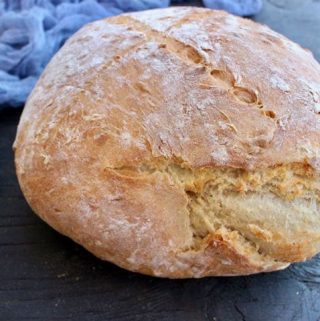
- A good homemade bread will have a soft, fluffy center with big holes and a crust that crackles in your hand with even a gentle squeeze. It’s very important to not overwork the dough if you are looking for airy holes in your bread like the ones in the photo above.
- Avoid the temptation to add more flour, simply dump the dough out of the bowl you mixed it in and shape into a loaf. No Kneading Allowed!
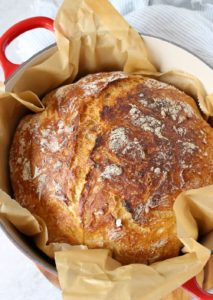
- I swear there’s nothing like the magic of a pizza stone, however you could also bake it inside a cast iron skillet or dutch oven if you really wanted to.

How to Serve and Eat Crusty Bread
- dip in olive oil with red chili flakes and fresh herbs.
- alongside Pasta e Ceci, Zuppa Toscana, Roasted Pepper Tomato Soup + Frutti di Mare.
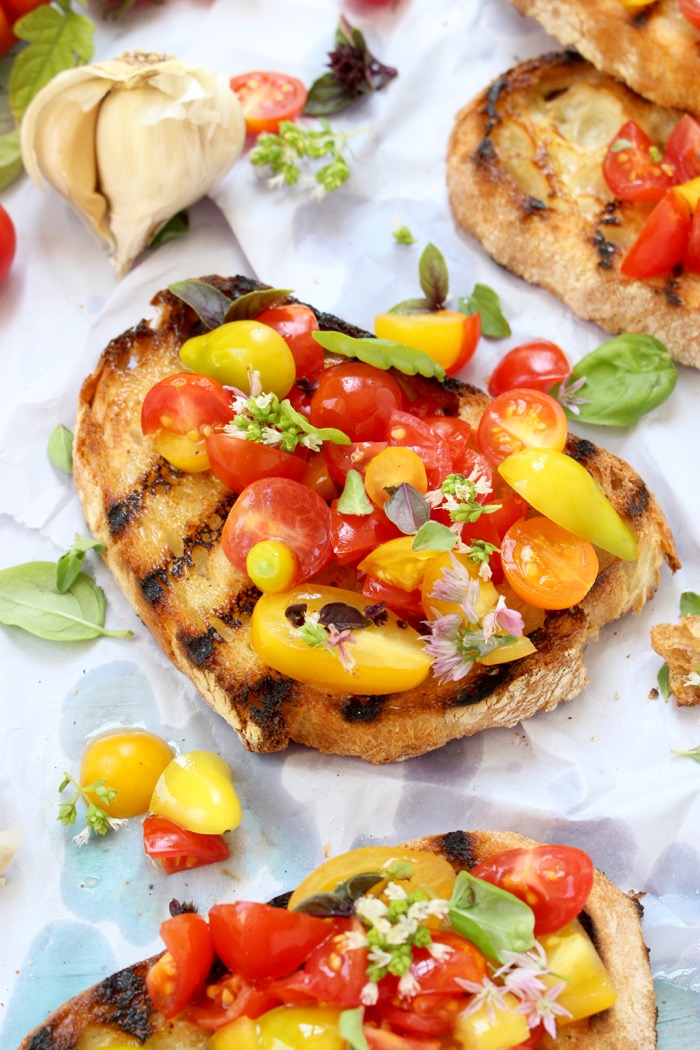
- make the ultimate Tomato Bruschetta!
- enjoy with Oven Roasted Tomatoes + vegan mozzarella.
- tear a crusty corner like nobody’s watching while still a little warm and spread a little butter on it.
- add 2 tablespoons of rosemary to the dough, 1/3 cup of sliced black olives or sprinkle the top with poppy seeds before baking.

What makes the bread crusty?
The secret is a bowl of water steaming under the pizza stone while the bread is baking. The steam makes a crusty loaf!
How to Store
Allow the loaf to cool off completely on a cooling rack on its side. Place it in a plastic bag and store on the kitchen counter at room temperature for a couple of days. I would not recommend freezing this kind of bread, instead if you find yourself with a stale chunk simply do as the Italian do: make a big pot of Ribollita or this Tuscan Pappa al Pomodoro soup.

Rustic Crusty Italian Bread Recipe Video
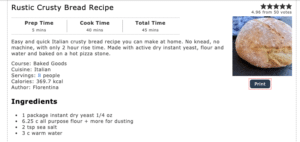
Rustic Italian Crusty Bread Recipe
Ingredients
- 3.25 cups all purpose flour + more for dusting
- 1 tsp sea salt
- 1.5 cups warm water
- 2 tsp instant yeast (or active dry yeast)
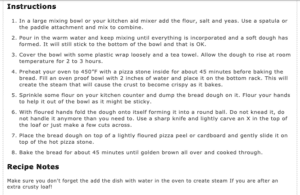
Instructions
- In a large mixing bowl or your kitchen aid mixer add the flour, salt and yeast. Use a spatula or the paddle attachment and mix to combine well.3.25 cups all purpose flour, 2 tsp instant yeast, 1 tsp sea salt
- Pour in the warm water and keep mixing until everything is incorporated and a soft dough has formed. It will still stick to the bottom of the bowl and that is OK.1.5 cups warm water
- Cover the bowl with some plastic wrap loosely and a tea towel. Allow the dough to rise at room temperature for 2 to 3 hours until doubled in size.
- Sprinkle some flour on your kitchen counter and dump the bread dough on it. Flour your hands to help it out of the bowl as it will be sticky. Don't panic, this is normal.
- With floured hands fold the dough onto itself forming it into a round ball. Do not knead it, do not handle it anymore than you need to. Use a sharp knife and lightly carve an X in the top of the loaf or just make a few cuts across.
- Place the bread dough on top of a lightly floured pizza peel, cardboard or parchment paper and allow it to rest while your oven is heating up.
- Preheat your oven to 450”F with a pizza stone inside for about 45 minutes before baking the bread. Fill an oven proof bowl with 2 inches of water and place it on the bottom rack. This will create the steam that will cause the crust to become crispy as it bakes.
- Once your oven is hot sprinkle the pizza stone with some semolina flour or corn meal and carefully slide the bread loaf on top. Bake the bread for about 30 to 45 minutes until golden brown all over and cooked through.
- Transfer the bread to a cooling rack and allow to cool off completely before slicing into it. You can also let it cool inside the oven with the door slightly open.
Dutch Oven Method
- Instead of a pizza stone preheat your oven with a dutch oven inside. Once hot, carefully place the bread loaf inside the dutch oven ideally using parchment paper for easy transfer. Cover with the lid and bake for 30 minutes. Remove lid and bake another 5 minutes until golden brown on top. Remove the bread from the dutch oven and transfer to a cooling rack or it won't stay crispy.
Original Large Loaf Recipe:
- Ingredients: 1 package instant dry yeast (1/4 oz)6.25 cups all purpose flour + more for dusting2 tsp sea salt3 cups warm water.
- Instructions: Follow the above instructions and bake at 450"F for 45 minutes.
Video
Notes
- Adaptation Jan. 2021 - because some people were having trouble working with a large loaf, I adapted the recipe to make a smaller loaf that is easier to handle and that will cook evenly even without a pizza stone. Those of you more experienced bakers with a pizza stone or a bread/ pizza oven feel free to double the recipe and make a huge rustic loaf out of this.
- Water dish - make sure you don't forget to add the dish with water in the oven to create steam If you are after an extra crusty loaf!
- Parchment paper - If using parchment paper make sure to check the box for the max temperature it can safely be used in.
- Keep it Crusty - make sure to allow your loaf to cool off completely on a high cooling rack so the moisture can escape through the bottom while the crust stays crispy. Alternatively allow the loaf to cool off on a rack inside the oven with door slightly open. (remove from dutch oven and discard parchment paper first).
Nutrition
You’ll Also Love:


Delish & paired well with a homade lasagna soup on a cold new england night. Yum. Thanks for sharing & for the tip to not add more flour. I was tempted! Bread came out perfect.
Hi Florenina,
I attempted to make this bread and it came so delicious.
however, my bread had a much denser texture, but very soft.
would you be able to point out what could have possibly gone wrong in my bread making process?
thanks so much for your clear and straightforward instructions.
Much love
Ardy
Hi Ardy! Is it possible that you overworked the dough when you formed your loaf ? That would explain the denser texture.
Followed your recipe exactly. Absolutely perfect! The only thing I did different was make 4 smaller loaves out of it. Will definitely make this again. Thank you!
Thank you! I was looking for a quick recipe and this one was absolutely perfect! When I was forming it into a loaf I had worries as it felt sticky and I was worried it wouldn’t keep its shape, but I shouldn’t have worried! Crispy on the outside, nice and airy on the inside. After reading the comment on the Pampered Chef pizza stone not liking that high of heat I decided to use my round Lodge cast iron Dutch oven. I served the loaf with scallops in a butter, white wine, shallot, garlic, and cherry tomato sauce. The bread was so good with the sauce. Florentine, do you think this recipe would work for adding chunks of Asiago cheese and roasted garlic to? I was thinking I could add them just before the rise. Thank you again.
I’m so happy you loved the bread Cathy. I have only tried it with the addition of herbs, not sure how it will behave with heavier add ins…report back if you do try it! ~ Florentina Xo’s
Huge…. HUGE, “THANKS,” For this AMAZING bread recipe! It came out PERFECT! I am so dancing inside right now, my boyfriend is European and has a infinite love for bread. I just recently started making bread and have found I really enjoy it but need really good instructions. Watched your video 4 times and read and reread your instructions and can not THANK YOU ENOUGH! Totally love bread like this, that beautiful crispy crust and fluffy bread with big holes, just doesn’t get better than this!
Love and Thanks from Seattle and lol my boyfriend said to tell you the same! ❤❤❤
This makes me so happy and doing the happy dance with you, we love bread so much too and this is always a winner with everyone! I make it as often as i can too 🙂
THIS IS THE RECIPE I’VE BEEN SEARCHING FOR!!! Thank you so much. I made this for company and they were astounded at the perfection! I was about to get rid of my pizza stone, and now I have a new love for the thing! I placed a bit more yeast in so it would rise faster and that worked for me. I thank you for posting this! Now I feel like I can make authentic Italian bread. THANK YOU for telling me to RESIST the temptation to add more flour. I bet that was what I’ve been doing all wrong —
I am soooooo happy you loved it and beyond excited that you listened to the instructions and the bread turned out great! Woohoo! ~ Florentina Xo’s
Wow so easy and so good. Was worried I mixed it in Kitchen Aid to long. What speed and how long should it be mixed. Looking forward to making it again!
Omg!! This bread is so delicious!! I made it today and it came out perfect. Crunchy, tasty, and a wonderful compliment to any dish. I served it with my Italian Wedding Soup and my husband and we almost are the whole bread. Thank you ever so much for this recipe.
So so happy you loved it Sarah 🙂
Can you use yeast starter with this recipe instead of packaged yeast?
Thank you for this recipe. One question. Do I put the water in at the same time as the bread or while the oven is preheating?
At the same time as the bread!
Ciao Florentina,,
Do you put in the dish with water during the 45 minutes preheating time, or only at the same time as the bread goes in?
At the same time as the bread 🙂
When do you put the pan of water in? When you start the oven up, or when you put the loaf in?
When you put the loaf in!
Unbelievable, crispy on the outside light and fluffy on the outside. Perfect!!!! I followed the recipe, I’m so proud of myself and thankful to you!!!!
Made this bread yesterday for spaghetti night. Turned it into garlic bread, was delicious and so easy to make. Just a real simple recipe. I bake my bread on a pizza stone on the grill, and it looked just like your picture. Thanks for the recipe.
I was cruising the net looking for a good bread recipe because my last three tries we’re anywhere from total fail to only average. Your recipe is awesome! It’s in the oven cooking now and it looks amazing! I can’t wait to cut into it and slather it with butter. All of my prior attempts had oil in them and yours did not and that may behave made the difference. Thanks so much for sharing your gift!
Well that turned out awesome. I like to bake things before bed so i can have them for breakfast, and I’m definitely having a lice of that with a poached egg in the morning. Not to mention the sandwiches, the dipping… basically, I’m pumped but haven’t cut into it yet. But when I knocked on it, it made the amazing hollow sound that good bread should.
I did take the liberty of measuring the flour for anyone else who defaults to grams instead of cups. It’s 1015 g plain white flour. Proceed accordingly with that!
I also baked it on a cast iron griddle instead of a pizza stone or skillet as I have neither of those. I imagine a really hot baking sheet would honestly work just fine, too.
xoxo,
Dannie
http://fashionablyfemme.me
Hi! Love your recipe! Made it a couple weeks and my husband loved it! The only problem i had was my bread stuck pretty badly to the pizza stone :(. I may have needed to flour it more or let it cool longer after taking it out of the oven. Any other recommendations?
Hi Sami, I’ve never had that happen before. The only thing i could think of is that maybe you forgot to preheat the pizza stone with the oven ..? If your stone is super hot just like the oven it would immediately start cooking the crust as soon as it touches it. Definitely sprinkle a little more flour next time before transferring the sough on top. Hope that will fix the issue.
Best bread I ever made or ate! And most simple!
Is it okay to let the dough proof for longer than 2-3 hours?
Sure, I’ve never had issues when I let it go an hour or two longer.
Can you use double 00 flour?
You can but you don’t need to, just all purpose flour works best 🙂
Thank you so much for sharing your fabulous recipe! The loaf turned out just like the video. I’m so happy I found your website!
Doing the happy dance over here, nothing like nailing a crusty loaf of bread right ?! Xo’s ~ Florentina
Can I use active dry yeast (which I already have) instead of the instant.
Yes!
This is my go to bread but I only have active dry right now! Would I need to alter the measurements or just use the same amount of active dry?
I have made it with active dry too, just make sure to use warm water, I didn’t change anything.
Can we cut into it right out of the oven! Or let it rest?
Let it cool off and rest a good 20 minutes.
I followed your directions, I thought to the letter. Very tasty BUT it was very heavy when I brought it out of the oven and the holes were very small. Not like your photo. So, what could I have done wrong? Only thing I can think of was mixing too long? Your help would be greatly appreciated as I do like the taste for sure but very heavy.
Hi Ken, sounds like you overworked the dough. After you let it rise and dump it out of the bowl you shouldn’t knead it at all, just carefully shape it into a loaf like in the video. I’ve made this countless times and it always turns out fluffy with lots of holes and super crusty. Hope you give it another try soon, you got this!
I’m 65 and retired. My wife and I ate at the North End in Boson. The best bread I had ever eaten. Went on line to find a recipe. I wanted to make Italian bread. Your recipe hit it out of the park.Thank you.. I can make bread right here in NH.
HI I come from the UK, and I do not know what is meant by 6.25 c flour or 3 c water , is this cups?
Cups 🙂
Just want to confirm that you place the pan with water on the bottom rack during the preheat? You mention it creates the steam needed during baking but will all the water evaporate during pre heat? Thanks!
If you add the pan of water during preheating of the pizza stone you might have to refill it again after adding the bread. Otherwise just add the water at the same time with the bread.
Thank you!